Labels

Showing posts with label GPP3 - Technology. Show all posts

Tuesday, 9 August 2016

T3 06 Tracing Images

Summary for this section:

Assessment Aim: The included tutorials provide an understanding of how the Pen Tools and Brush Tools work as well as working with type and managing layers in Illustrator.

Design Brief:


Part A: Produce a map of Tasmania, traced outlines of the state, include relief depictions, major towns and roads.

Part B: Trace the Fruit Shop logo previously produced in Illustrator.

Part C: Design an A5 invitation flyer.


Part A: 
Vector image, traced by hand in Illustrator.


Part B: 
Traced this raster image in Illustrator, by hand and by Trace Image tool.


Part C: 
A5 invitation flyer created within Illustrator, including a road map.


This activity introduced me to more complex functions of vector image tracing and drawing, including several hours of using the pen tool. 


CSFrost


Sunday, 31 July 2016

T3 - 04 Resizing Images


Summary for this section:

Assessment Aim: This activity is a continuation of Design 3 > LA 07 Grids, Layout and Flow and requires you to work within a set format of a design brief to produce a pre-press ready file.

Design Brief:
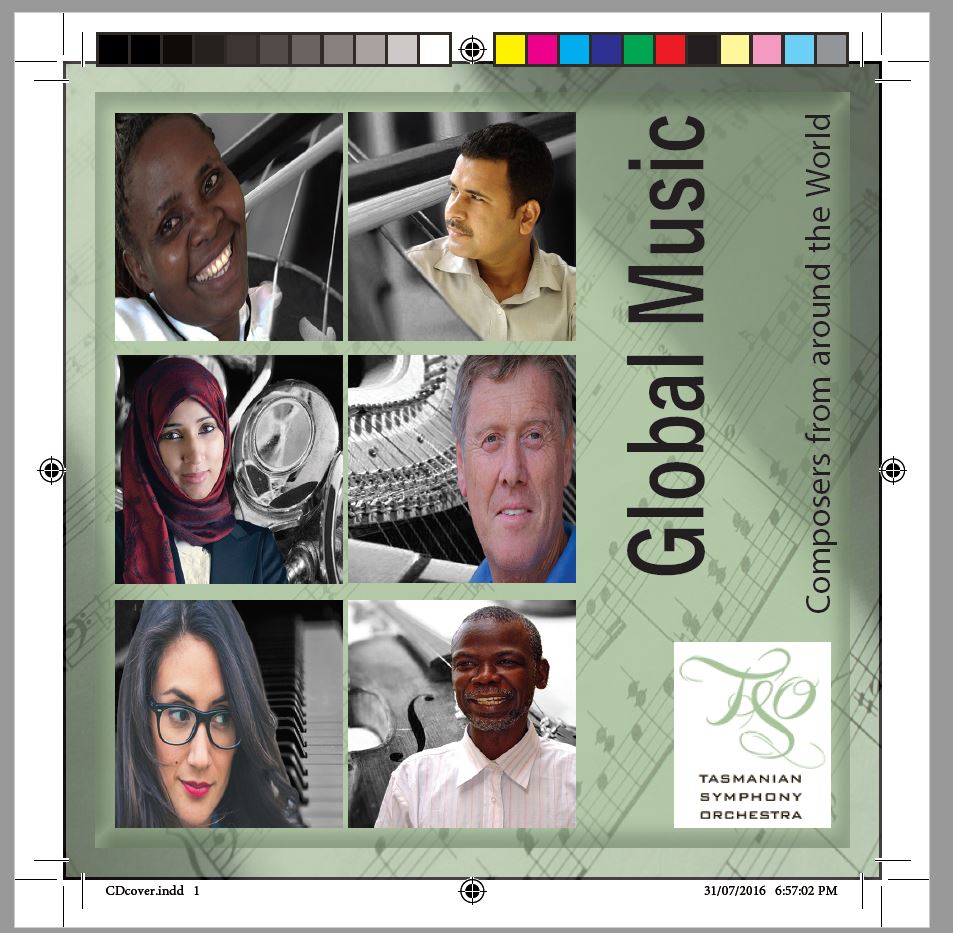
You are required to design a CD cover for the TSO (Tasmanian Symphony Orchestra) using Adobe Indesign and Photoshop. You will need images of people’s faces that represent modern composers.


Learning activity: T3 04 - Resizing Images submission.


PDF file ready for print.
'This learning activity required the implementation of knowledge gained on image resizing and print requirements including bleed and CMYK process colouring to achieve a solution to the design problem, as well as a greater understanding of Photoshop and Indesign for design manipulation, layout and print file formatting and packaging.'


CSFrost


Tuesday, 10 May 2016

T3 03 Digital Camera

Summary for this section:

The following course notes have been compiled to support and provide a basic understanding of the subject area. You are expected to research and read material that will build upon this basic material.

Assessment Criteria:

Complete the above learning activity for marking and feedback. Use Word or Indesign (export to PDF).

Save your file as photo_research.

My Learning Activity submission for this unit can be found here.

The document is in .pdf format; Viewing online you can navigate by mouse scroll, page buttons or keyboard arrow keys. The document has interactive navigation and subject links when viewed in Adobe Acrobat. 


'Simply, the more photos you take, the better and more consistent your photography will become'.

CSFrost

Saturday, 12 March 2016

GPP3 - Technology LA02 - Scanner

Summary
Greyscale vs Line art? Line art drawings (eg. clipart) are handy for photocopying and good for crisp, clean images. Black is the only present colour when scanning in this mode. Greyscale mode must be used to preserve any intermediate tones in the images. Obviously Grey mode has 256 shades of Grey. Greyscale is good for scanning black and white photos, like old historical photos. Learning the differences between these two scanning modes, Greyscale and Line Art can set you on the right path and give you good results. Which scanning mode you choose will depend on the original picture, so it’s important to crop/select the picture before hitting the ‘scan’ button, this will dramatically save on file size and time in scanning. This activity requires you to use a scanner and Adobe Photoshop. There are four parts. Use the scanner as per LA01 instructions.

1. Lineart images – choose a cartoon from newspaper Line art image at the lowest, mid and highest scanner settings. Evaluation of the differences between the three images/files.

2. Greyscale images – old family photo or picture from a magazine.
Greyscale image at the lowest, mid and highest scanner settings. Evaluation: the differences between the three images/files.

3. Lineart image – serviette/paper towel Line art 1200 dpi.

Evaluation of the images, Greyscale vs Bitmap and dpi differences and effects.


My Process


1. Accessed course resources, read instructions.
2. Created Notes document, watched resource video and took notes in visual diary.
3. Located a lineart/B&W image to scan and a greyscale image larger than 5x5cm.
4. Located a hand towel/napkin, checked size and durability.
5. Created tables for images, file size and resolution comparison as per video.
6. Scanned B&W image as per directions.
7. Scanned Greyscale image as per directions.
8. Scanned paper towel as per directions.
9. Populated images into tables with file information required, and completed the assessment of images activity.
10. Commenced creating blog post and will update the GPP3 course forum.
11. Moved from working folder to GPP/Technology3 folder, notes document re-created to become activity document and shared for assessment.


Evaluate the differences

Scanning in B&W/Line art/Bitmap significantly reduces the amount of information recorded, as well as quality. The quality can be improved to reduce the jaggy display of pixels, however the image will only contain two colour areas (one, black).


Scanning in Greyscale significantly increases the quality of an image as it produces a range of colours (shades) between the black and white in an image. This results in up to 256 colour areas being recorded and significantly increasing the file size.


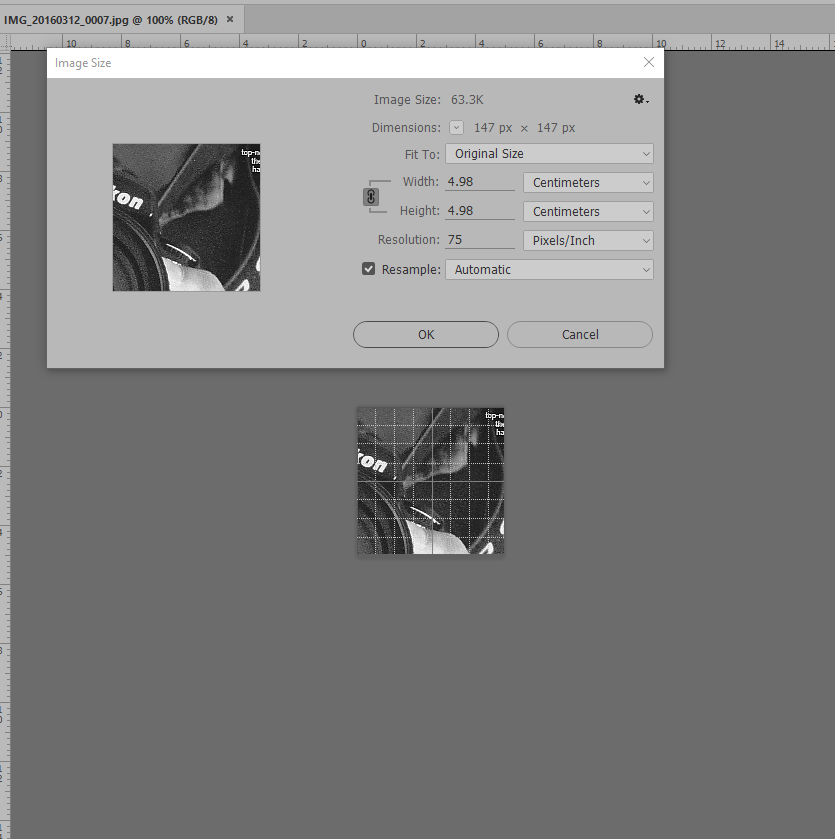
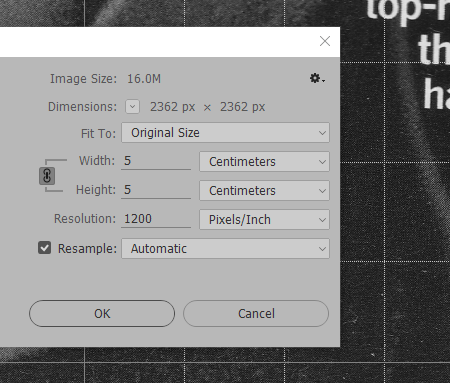
Another difference I noticed when the images were opened in Photoshop was the size of the image within the canvas. All file image areas were 5x5cm, however when displayed on the screen the images were displayed differently. The need to zoom-in on the image demonstrated how much difference in quality/information had been recorded.


2016-03-12 18_34_14-IMG_20160312_0007.jpg @ 100% (RGB_8).png 2016-03-12 18_32_03-IMG_20160312_0005.jpg @ 33.3% (RGB_8).png
The 75dpi (left) and the 1200dpi (right) Greyscale images in the canvas at 100% zoom.


The 75dpi B&W/Bitmap/Line Art image also showed single pixel lines, similar to drawing with the pencil tool and a very small brush.


These images have been saved in this activity in JPEG. Not a standard that is usually used professionally and these file sizes are not indicative of the file sizes of professional digital images and work.


Uses for Bitmap scanning can include capturing of the Thumbnail process or scans of quick sketches as well as for designers and animators who are intending on using the image for vector graphic work. An increase in quality of the scanned image will result in much more professional vector conversion or image to trace.

Greyscale allows for images to be captured in greater detail. However, the cost of this detail is the increase in file sizes. Lower dpi means more noise is captured instead of the smooth gradients over the scale.


Full learning activity can be viewed here.


CSFrost


Friday, 4 March 2016

GPP3 - Technology - LA01 - Scanner story

Summary
Ensure your final artwork:
• Fills all of scanner area to A4 vertical
• 72dpi (or your lowest setting)
• RGB mode
• Open in Photoshop, resize image – Image > Image Size 700 pixels wide
• Save as a JPEG – call it story
• File size – under 1MB
• Submit using the Technology 3 > LA01 Scanner Story Forum to share with others, give a description in your message, also upload to your Blog. You need to gather 9 objects that represent your story. Think about what sort of objects do justice to your story and look at it from the perspective of your viewer; it needs to "makes sense". Arrange them together on your flatbed, close the lid, cover with a black cloth to stop light coming in the sides and scan them in.


Production:

I have been watching tutorial videos and creating my own digital drawings in Photoshop for much of the last two weeks; With the Scanner story activity I decided to focus on some of the non-digital art supplies I have been amassing. 


I laid out a selection of items covering the scanner surface. I used a green cloth (trying for a green screen effect) to fill empty spaces and a black cloth covering the overall scanner. My lowest DPI setting is 75dpi. I initially scanned using the scanner software, but I did my final import using Photoshop [File>Import>WIA support] into a new document ensuring RGB colour was selected.  

The image was re-sized [Select>Select All, Image>Image size] to 700px Wide. I labeled the 9 items using Text layering for a reference image. Exported the image as a Jpeg renaming to ‘story’ on save. The file size was 575kb, coming in under the required limit of 1Mb. 

Story
I have linked this post on the Technology 3>LA01 Scanner story forum.

Note: The highlighter pen is bright yellow, the spiral ruler cogs are bright green and the Kilometrico pen lid is bright orange ... oh and the scanner light created those rainbow colours down the edge of the metal scale ruler.


... stories:

One: Spiral ruler;
This was an awesome score from Kmart for about $2.
https://www.youtube.com/watch?v=j15moh6lA1Y

Two: Highlighter pens;
Been using them a lot for tutorial notes, but they can be used creatively.
https://www.youtube.com/watch?v=m9pzkmIvHZw

Three: Scale ruler;
A really nice metal ruler, that allows for precise line drawing.
https://www.youtube.com/watch?v=CYtHdmvmrXQ

Four: Pencil set;
Another score from Kmart for about $3.
https://www.youtube.com/watch?v=nDe7kHa6MVo

Five: Scissors;
There is no undo on these bad boys.
https://www.youtube.com/watch?v=MZxtgUoGzMQ

Six: Pens;
Kilometrico pens come in some really cool colours.
https://www.youtube.com/watch?v=Vd_XxELtX7g

Seven: Overlay markers;
Before Photoshop layers, these were some of the tools for marking on transparent plastic overlays. 
http://www.maptools.com/other_tools

See some of the advances in overlay technology here:
http://video.arcgis.com/watch/129/interactive-pen-display-for-gis-and-geodesign

Eight: Drafting template stencil;
Before Photoshop shapes ...
http://www.faber-castell.com.au/55758/Products/Technical-Drawing/Technical-Accessories/fcv2_index.aspx

Nine: Big marker pen.
Who doesn't like big marker pens?
https://www.youtube.com/watch?v=63RJN4W4TUk

CSFrost